RHS

RHS

Did You Know?

   Ceiling fans are not only functional but also add a touch of style and comfort to any room. Whether you’re looking to beat the heat or simply enhance the ambiance of your living space, installing a ceiling fan can be a straightforward and rewarding DIY project. In this guide, we’ll walk you through the steps to install a ceiling fan in your home, from choosing the right location to wiring it correctly. Let’s dive in!

Choose the Right Location:

  • Before you start installing your ceiling fan, consider the ideal location for it. You’ll want to place it in a spot where it can efficiently circulate air throughout the room.
  • Opt for a location where the ceiling is flat and sturdy enough to support the fan’s weight.
  • Ensure there is sufficient clearance around the fan blades to avoid any obstructions.

Gather Your Tools and Materials:

  • Ceiling fan kit (including the fan, mounting bracket, and hardware)
  • Screwdriver
  • Wire cutters/strippers
  • Circuit tester
  • Ladder
  • Pliers
  • Wire nuts
  • Electrical tape

Turn Off Power:

Safety is paramount when working with electricity in your home. Electrical accidents can lead to serious injuries or even fatalities if proper precautions are not taken. Whether you’re installing a ceiling fan, changing a light fixture, or conducting any electrical work, it’s essential to prioritize safety at all times. This includes turning off the power at the breaker box, using insulated tools, wearing appropriate personal protective equipment, and following manufacturer instructions meticulously. Additionally, knowing how to identify potential hazards and understanding basic electrical principles can greatly reduce the risk of accidents. By taking these precautions and being vigilant, you can ensure the safety of yourself, your loved ones, and your home while working with electricity. Finf more info at ESA.

Install Mounting Bracket:

  • Most ceiling fans come with a mounting bracket that attaches to the ceiling.
  • Follow the manufacturer’s instructions to secure the mounting bracket in place using screws provided.

Assemble the Fan:

  • Assemble the fan according to the instructions provided in the kit.
  • Attach the fan blades to the motor housing, making sure they are securely fastened.

Wiring:

  • Carefully follow the wiring diagram included with your ceiling fan.
  • Typically, you’ll connect the fan’s wires to the corresponding wires in the ceiling using wire nuts.
  • Use a circuit tester to ensure the power is off before making any electrical connections.

Attach the Fan to the Mounting Bracket:

  • With the help of a friend or family member, lift the fan assembly and attach it to the mounting bracket.
  • Secure it in place using the screws provided.

Install the Fan Blades:

  • Once the fan is securely mounted, attach the fan blades to the motor housing.
  • Make sure each blade is aligned properly and tightened securely.

Test the Fan:

  • Before finishing up, double-check all connections and ensure everything is properly installed.
  • Turn the power back on at the breaker box and test the fan to make sure it’s functioning correctly.
  • Check for any wobbling or unusual noises, which may indicate improper installation.

Finish Up:

  • Once you’re satisfied with the installation and the fan is working correctly, tidy up any loose wires and secure them with electrical tape.
  • Install the fan’s decorative canopy to cover the electrical box and wiring.
  • Lastly, turn off the power again and install the fan’s light kit (if applicable) following the manufacturer’s instructions.

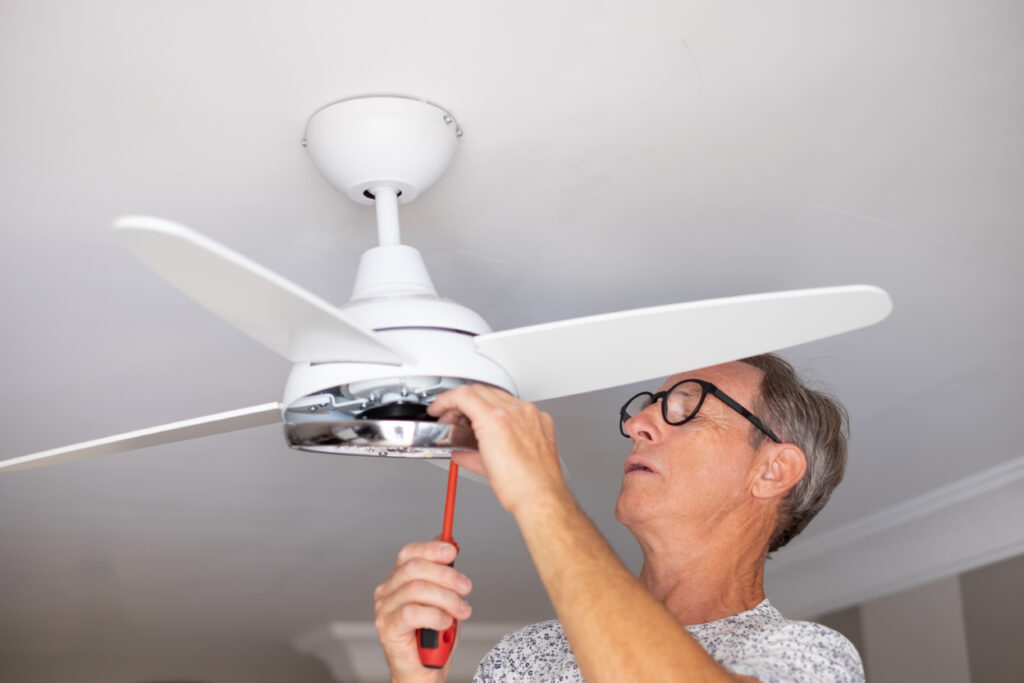
Installing a ceiling fan can be a rewarding DIY project that adds both style and functionality to your home. By following these step-by-step instructions and exercising caution when working with electricity, you can enjoy the cool breeze and ambiance provided by your new ceiling fan. So, why wait? Beat the heat and elevate your home décor with a stylish ceiling fan installation today!


Related Post